The Facility NM: Notes & Tips

When we did this dungoen, we worked from the LOMS walkthrough but deviated a lot.  Our notes for future reference/future planning…

Group makeup
Tank – went healtank for all but fights 1, 4 & 5 (4 – dps, 1, 5 – reg. tank)
Healer – went dps (ours went pistol/shotty)
DPS – useful to carry exposed & afflict since tank can’t reg. apply when healtanking; 800 hit

Fight 1 – The Degenerate

  • -everyone watch for: rush, ball breaker, bad taste
  • -you could probably go 5 dps if you wanted. tank and spank, watch out for his rush (bigger than telegraphed, hits a bit behind him) & ball breaker, and placement of his green spew (can be impaired?). otherwise. burn him. goes down easy.

Fight 2 – Redguard

  • -watch for: roof collapse, electromagnetic cauterization, leftist element, extreme right
  • -tank: healtank again. start the fight by the far left corner. tank him on outside of arena. stay close to keep him from doing magnetic conduction (will chain dps), eat his attacks & heal through. move when he casts electromagnetic conduction
  • -tank needs to move in S pattern, tank him until he does electromagnetic cauterization, run along outside one block, come in, run inside to avoid EC and over to the next block. be ready to pick him up again/stay close to avoid magnetic conduction. (see diagram)
  • -dps will move only one block, shoot him when he pauses (do not get too close or lightning will kill you), then run to next block when he starts to roof smash (he may EC again, in which case just run to next block). attack at next block until next EC, rinse and repeat.
  • -corners can get tricky if he decides to go inside–tank should LOS him to make him come around the corner.
  • -dps: have a care for how close you stand near him especially when he’s standing in his lightning poop left over from EC.
The Facility - Redguard fight movement map

The Facility – Redguard fight movement map

Fight 3 – Contain the Filth

  • -basics: everyone huddle by nodes to charge them, run to upper levels when screen turns black & white
  • -tank: healtank, pick up adds, during black and white phase run fast and far on upper platform to avoid getting hit too much by adds
  • -dps: charge nodes, burn down adds (tank was getting overwhelmed when we didn’t), avoid getting hit by adds during black and white phase. easy fight

Fight 4 – Facility Core

  • -basics: avoid lasers (watch for target above head & others dragging lasers), watch out for walls appearing, burn robot adds, watch for core overload
  • -build notes: everyone went dps with some self- or group-heals here. have an AoE for adds/bots, Death from Above. our group had 3 people with ARs & reap & sew/suppressing fire, and one person ran Art of War to help grab the bots
  • -positioning: spread out a bit to help spot bots. we had three on one side two on another
  • -one of our dps who was good at avoiding the lasers shot the core immediately upon entering to attract the first laser. this allowed the other dps to focus on burning the core for the initial part of the fight
  • -burn those adds! if they touch the core it gets a 100% heal. we had one dps alerting us to when they were coming/where they were
  • -during the phase where most sections fill with lasers, dodge roll or dash left or right to a clear section. the next repetition of this phase use rocket jump. also beware getting too close to the core as being too close seemed to lead to death (pulse? laser spawning/no room to flee? not sure).
  • -picking a direction to try to kite the lasers seemed to help but there were times when you ran out of space or had to cross with someone else (at that point the best thing to do was for one of you to stay far out and the other to tuck in towards the core)
  • -one of the tougher fights for us in this dungeon, just a lot going on.

Fight 5 – Filth Scientists (Five Guys!)

  • -basics: capsule breaker is a bitch. no, stay by nodes, watch your dps so you don’t kill the scientist in a bad place and drop filth, watch timing to swap nodes. impair lightning manifestation and black hole. can eat everything else when at a live node.
  • -build notes: 1 or 2 dps bring an impair for sequence analyst (chaos user), tank went normal tank w/ chaotic pull/domino effect for this but we could see how it could be done with a healtank. our tank healed themselves by running in and out of node effect area. death from above for all dps
  • -for the most part, burn scientists, switch nodes when one dies, and be sure to pause dps around 30k. one or two dps may use builders to bring it to near death but be careful!! once tank positions scientist, kill it
  • -capsule breaker may start running back after tank positions him, may need to help with positioning it and hopefully not die (we did not find being out of the node instant brutal death as suggested in LoMS walkthrough but you must be careful)
  • -the lower health can be before pull (or even pull at death) the easier to position
  • -pause dps if needed to switch nodes safely
  • -elementalist and chaos user can be a bit chaotic; coordinate btw tank and dps with impair as to who is impairing lightning manifestation and who is impairing black hole. others, if one gets off and you must switch nodes, try to move with caution (easier said than done of course)

Fight 6 – Halina

  • -basics: lots of screaming, the balll!!!!!!!!!! phase one: impair anima decompression, call to the cosmos, pause dps if needed to get her off you after contempt; phase two: dps grab halina, tank kites ball, burn halina, run when she casts spite, coordinate to avoid ball
  • -buggy – halina bugged out and did not switch to phase 2 if we burned her too fast; one rdps had to carry agitator to keep halina; provoke didn’t seem to work reliably; sometimes we did not get the node buff right away (or ever, in some cases)
  • -build notes: melee dps applied exposed, which made a big difference; one rdps had agitator, tank went healtank with Rapid Getaway passive; one dps carried reap and sew for moments where health got too low; all dps carried provoke to ensure halina stayed on them at phase 2 (again, this was buggy for us)
  • -first phase is relatively straightforward – attack her by the node just to the left of arena entrance until she runs to the left side of arena; impair call to cosmos; finish burning her; just before she kills everyone, head to next node (the node to the right of where you enter the arena).
  • -while dead, watch which nodes agartha activates (beam shoots from the portal to the right into whichever nodes are activated. Be mindful for when it is the 2 nodes nearest the right side, as the beam is so short that it becomes hard to notice). dps, head for the one farther from the anti-agartha (left side portal) as soon as you can; tank stay closer in order to aggro ball and spam heals. dps, hit and provoke halina to make her come after you.
  • -when she begins to spite the node the dps are at, head for the other active node but be aware of where tank and ball are! we made it the dps’s job to avoid the tank so tank can concentrate on kiting and not get caught by ball
  • -dps, be sure to provoke/hit halina once she finishes spite because she’ll lose aggro and head for tank
  • -when at next node, look for the new one agartha has activated; resume burning halina, rinse and repeat

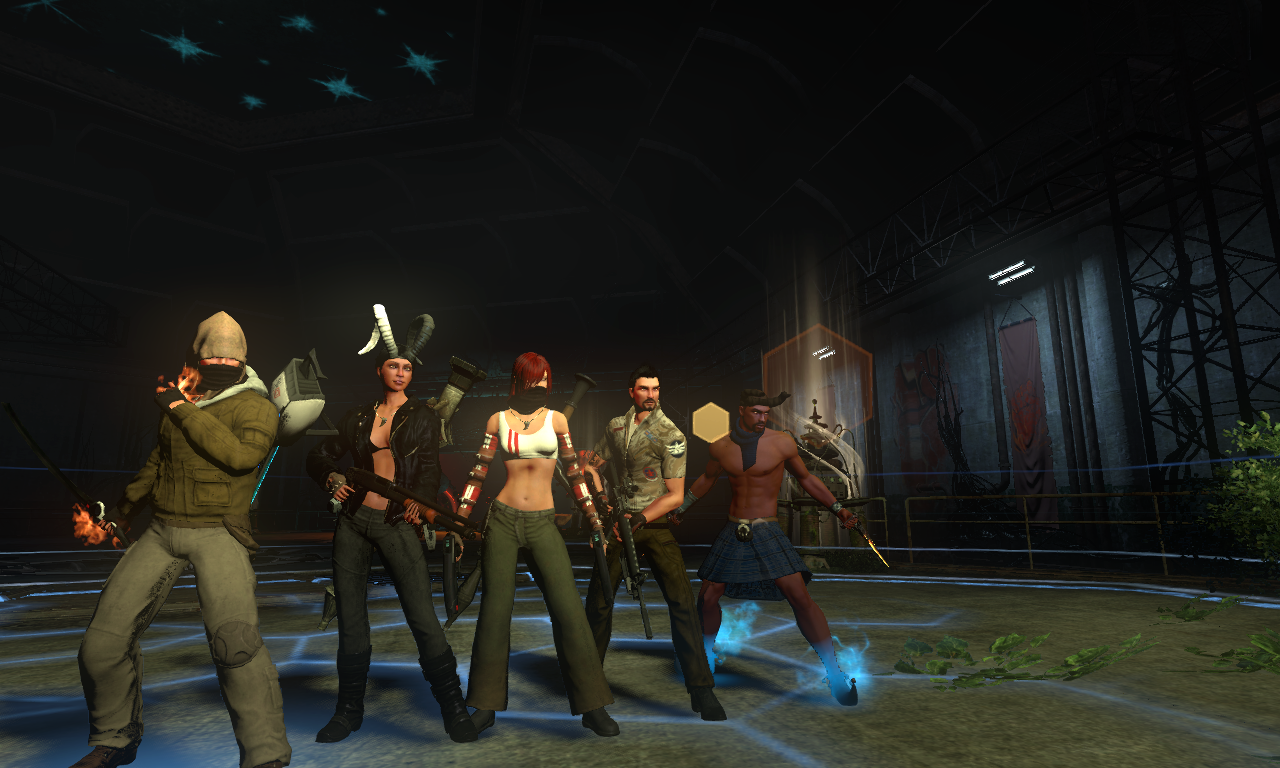
TSW Diary: The Facility Nightmare: defeated!

Taiver_picture376

I’d really like to put together some notes on this dungeon as we deviated a bit from the walkthrough we used from League of Monster Slayers. Fights 4, 5, and 6 were the most challenging, but unlike the LoMS we didn’t think fight #5 was the hardest fight in the dungeon. We probably had most trouble with 4 and 6, with movement errors or buggy behavior (like nodes not giving buffs) causing us the most trouble.

But in the meantime, two photos of the victors! Two more dungeons to go before we’ve got our karma curios :).

Taiver_picture361

Ankh Master Planner Builds & Tips

recent-cropWe recently Master Plannered the Ankh NM and thought it would be useful to jot down some notes and builds! This is not a complete walkthrough — we referred to the League of Monster Slayers’ walkthrough, for the most part.
http://www.lomsglobal.com/index.php?threads/ankh-nightmare-strategy-discussion-and-tactics.37/

Builds:

Tank

Sword/Chaos tank

Actives:
Blade Torrent
Steel Palace
Reality Fracture
Provoke
Chaotic Pull
Spiral of Death
Art of War
Death from Above

Passives:
Agitator
Cause and Effect
Fuel to the Fire
Perfect Storm
Breakdown
Hardcase (I think?)
Contortionist (I think the hinder immunity helps with Dead Ops, but your mileage may vary)
Rocket Science

Healer

Fist/Blood healer

Actives & Augments:
Cauterize (Miraculous Augment)
Nurture (Restoring Augment)
Surgical Steel (Vivifying Augment)
Exquisite Corpse (Impenetrable Augment)
Confuse (Curing Augment)
(Your choice)
Fired Up (Mending Augment)
Death From Above

Passives:
Subtlety
Brawler
Healing Sparks
Shadow Medic
Nurturing Gifts
Mad Skills
Empowerment
Rocket Science

Rotation Cauterize x 3, Nurture, Cauterize, Surgical Steel

Stats:
Healing power; 736.8
Healing Rating: 3754
Crit Rating: 1035
Crit Power: 759
Health: 3408

DPS 1

Pistol/shotgun DPS with Bomb Squad, Dirty Tricks, Confuse and Subtlety

DPS 2

Pistol/shotgun DPS with Confuse, Subtlety and buffs (DA/BS)

Actives:
The Business
Shootout
Out for a Kill
Scattershot
Breaching Shot
Deadly Aim
Confuse
Rocket Jump

Passives:
Subtlety
Elemental Force
Brawler
Iron Maiden
Twist the Knife
Lethality
Seal the Deal
Rocket Science

Build with The Business and OFAK, Scattershot with grouped enemies. Use Shootout every 7th counter for Ele Force. With heavy-hitting bosses, always save BS/DA for the AR’s Reap and Sew. When Reap and Sew is not necessary, I alternate BS and DA; the healer seems to get bigger heals with this method instead of relying on spike damage/heals. Stay at maximum distance for Melothat: you’ll already be closer than feels comfortable. In ‘The Colossus, Melothat’ phase, burn adds ASAP. Otherwise stay with other DPS and PEW PEW PEW.

Support DPS

AR/Elemental with Reap & Sew, Confuse, 12 Gouge & Short Fuse

Actives:
Suppressing Fire
Three Round Burst
Blaze
Lightning Manifestation
Short Fuse
Confuse
Reap and Sew
Death from Above

Passives:
Subtlety
Twist the Knife
Lethality
12 Gouge
Eagle Eye
Elemental Force
Probability
Rocket Science

High pen + DPS gear

All our DPS and Healer carried Confuse and Subtlety due to the last boss. We don’t normally have aggro issues, but Melothat’s aggro seemed wonky–at times even provoke wouldn’t pull him off DPS or healers.


Fight Specific Notes

Fight #1 Squalid Hekaturgist

Thom (tank) – Heka Blast on the tank can be interrupted. Can’t remember its name tho.
Taiver (support DPS) – We actually found it is easier to avoid motes by staying closer to the center until just before the motes are about to move inwards. I try to keep track of where the motes are by keeping an eye on one and moving sideways when it does.

Fight #2 Dr Klein

Thom (tank) – I use chaotic pull to pull down Klein’s add. Watch where you position yourself to make sure you have enough room when the add dies to move out of both the ground attack and be able to move right or left if Klein decides to badly time his Left/Right attacks. LOL.

Taiver (support DPS) – All DPS should defensive target the tank for Reap & Sew. Even if you are a ranged DPS/healer it is a little easier to avoid the waves and motes if you stand closer to Klein. I stand just forward of the broken side walls, still far enough back to avoid the Heka Blast when the add is killed. If we’ve survived two waves and still have yet to kill Klein I ignore the add and focus on bringing down Klein before he call pull his waves-on-both-sides shit. (Non-issue with MP build using Suppressing Fire since I’m hitting both) Reap and Sew as soon as you see the purple flare that indicates Dreaming Shroud, pop buffs if you have them and use consumers to keep tank up.

Fight #3 Orochi Dead Ops

Thom (tank) – If you have an Aoe type impair like Art of War, use it when your health starts to get low as this buys your healer some time to get you back up. You can also use rocket jump to get away from everyone whacking on you if health gets low again to once again buy a few seconds of attack free healing time.
Taiver (support DPS) – All DPS should defensive target the tank. Choose one Dead Ops to kill at a time. Hit Reap and Sew during the first fight/Dead Ops when healer calls for it or if when I see the tank nearing ¼ life. Once one Orochi is dead things get much easier. Watch your feet!

Fight #4 Dimensional Arachnid

Thom (tank) – Try to hit all the adds. Run around hitting adds. Use rocket jump to get to hit adds. Still watch them attack Kaloni instead. Cry.

Taiver (support DPS) – Mew mew mew. This fight is pretty much a small speed bump. Pretty straightforward for dps on this one: shoot the big spider, watch your feet. If Bad Things happen and healer dies near the end of the fight Reap and Sew can keep the tank up for a little while.

Fight #5 The Colossus, Melothat

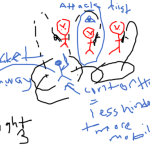
Thom (tank) – After pulling the first set of adds from the gate, you can position them in front of the colossus to hit both them and start stacking Exposed on Colossus. Be careful not to get too close though. Then immediately go to pick up the Dead Ops from the next gate. Usually will Chaotic pull DO about halfway down the hall and to one side of the hallway so that if he frags it leaves enough room for DPS to safely run past. Once DPS goes to attack Colossus, lead the Dead Ops past the gate. If you can chaotic pull him again to one side a little ways from the gate. (Basically give yourself enough room so you can hit both him and the colossus when he gets to the gate. Also make sure he is positioned far enough from the gate so if he frags and the DPS needs to run through the gate opening, they aren’t forced to take a frag in the face. Easiest way to position him is to just chaotic pull him where you want). Hit colossus, until he awakens again, when you see the adds start coming up, hit them once (I try to leave a ground effect . the chaos equiv of crimson theatre but i forget the name right now) and then rocket jump ahead and pick up the dead ops – that is probably less important when not Master plannering, as there will be more hinder options and more distance if people use ARs and you can then just immediately go to last adds. (Careful not to stay too long) Again, use an interrupt like art of war if your health gets too low.

Taiver (support DPS) – Ugh, stay alive if you’re the one carrying R&S! For MP we only had two hinders (both carried by one DPS) I had most trouble with the final wave adds making a beeline for me (they’d run straight past the others D:) and blowing me up until Thom picked up the first wave of them. Rough. If you’re not doing Master Planner, tactical retreat is useful.

Rest of fight strategy: Stay to your left (or opposite side your tank chooses). Run up to gate with other DPS, shoot gate down, place lightning manifestation as soon as you see the door-falling animation. Then back up and spray suppressing fire; between the three of you those adds should go down fast. Turn and murder the two adds your tank is currently occupying, then burn down the Colossus to 25%. Run as soon as he gets the red aura, use rocket jump to get to the next gate and watch out for Frag Grenade (staying left helps!) Burn that gate down, again place lightning mani right at gate fall and murder adds. Spin and get a few shots on Dead Ops on your wave to Colossus. Kill the adds with AoEs, then work on burning the Colossus. Use rocket jump as soon as he gets the red aura to get through the next gate. Kill Dead Ops, then attack Colossus. As he begins to wake pop buffs, start falling back but stay with pistol DPSers and burn first wave of adds with no hinders. Continue to alternate between Colossus and add waves until all are dead. Keep an ear out for healer’s call for R&S or monitor tank and pop when he gets too near ¼ life.

Fight #6 Dr. Klein and Melothat, Part Deux

Thom (tank) -Cry.

Then fight. Watch for Stupid Big guy to get to 87something health or some shit, try to mostly use builders as it gets close so you can have full consumers ready for klein, and then start running like crazy and rocket jump before platforming shit cause you can’t do shit up there. This one is less important. Make sure to tab on Klein if you use something like reality fracture ?? is that it. IDK. (Right now i’ve been using Impair + passive to increase hate gen after impair, then reality fracture, then sword consumer, throw in a blade torrent or two if time, then jump off. Try not to fall in filth pool. MAKE SURE TO TAB BACK ON Big guy or mouse click him if things are being a butt. Start attacking him.

Second one is worse. I think it is 57? something or something. Anyhow. Run/Rocket jump, run up tab on klein, hit him with same stuff as before, run down stairs, look for where the platformlip bends down if you can fucking see it in your haste (let’s be honest, probably not becuase who has time to adjust camera angles?) then jump down and hope to god you had the right spot – 50/50 chance at this point. Watch as the Big Guy is already up, and cry. And forget to tab back on him and wonder why you aren’t getting his attention. Tab on him and provoke and hope people are saving your ass and not dead.

The rest is easy compared to that so who cares.

Klein appears. Hit him. Go get Big guy again. Until he dies. Then worry about klein. He dies soon enough anyhow.

Taiver (support DPS) – Stay to the far left, near the filthed end of the L-shaped platform. I prefer to save my buffs for when he’s immobile and we can murder the shit out of the big guy. Keep your R&S for the third time Melothat is up. Pew pew until he flops over, get in closer and murder, then back away as the tank gets close. Stop shooting and confuse as he starts to rise. When Klein comes back, hang back until tank stops Wave of Mutation and the motes. Then kill Colossus. When Colossus is dead attack Klein. Repeat until Klein goes upstairs. At the end, attack the add on the right and pop R&S when his Unnatural Selection finishes. All DPS should target themselves at this stage. Finish killing adds, focus on Klein, stay back in case he does Heka Blast.


Thom’s Very Special Diagrams

These will make sense after the fight. I swear.

Nightmare Builds: Chaos/Sword Tanking

This is a great basic chaos/sword tank build from Thom which can be easily altered to meet the various situations  you’ll find in the first 3 Nightmare Dungeons.

Actives
Blade Torrent
Steel Palace
Karma
Martial Discipline
Stunning Swirl
Trial by Swords
Chaotic Pull
Diamond Grit

Passives
Agitator
Unfair Advantage
Regeneration
Perfect Storm
Hardcase
Breakdown
Forged in Fire
No Love Lost

TSW Deck Builder

Scenario Builds: Lightroad’s Spin Doctor/Taiver Variant

Lightroad came up with this very effective build for NM solo scenarios.  The healing comes entire from Leeching Frenzy and Circulation paired with your heavy-hitting consumers.  Gear balance is pretty important and be sure to adjust your health/attack with animas if needed.

Actives
Escalation
Clearing the Path
Karma
Chaotic Pull
Helter Skelter
Uneven Ground
Stunning Swirl
Death from Above

Passives
Intensity
Circulation
Leeching Frenzy
Shoot ‘Em Up
Brawler
Kill Streak
Calm Cool and Collected
Rocket Science

TSW Deck Builder

Gear should be 5000+ health, plus a health anima bringing you over 6000; HR 400-700 (1 major or 1 major and 1 minor, as you find necessary); the rest attack.  Depending on your block/evade/defense, you could switch CCC for Fluid Defense or Probability.  Scenario builds are as much about what you are able to comfortably use when the situation gets hairy as the build itself.

Taiver’s variant:
Blade Torrent instead of Escalation
Breakdown instead of Intensity
Turn the Tables for Uneven Ground
Probability for Calm Cool Collected

TSW Deck Builder

Nightmare Builds: AR/Elemental Support DPS

This is Taiver’s favorite build, doing moderate-high DPS with ability to swap in passives/actives to do purges, off-healing and hinders.

Actives
Safety Off
Three Round Burst
Blaze
Lightning Manifestation
Short Fuse
Suppressing Fire
Do or Die
Death from Above

Passives
Iron Maiden
Lethality
Ferocity
Twist the Knife
Eagle Eye
Elemental Force
Probability
Rocket Science

Swaps: Magnetic Wipe for Blaze or Lightning in a Bottle for Iron Maiden in fights that need a purge; specifically on DW5 Magnetic Wipe works better because the boss teleports all over, and in DW6 Lightning in a Bottle is better to purge the adds’ buffs.  Do or Die can be swapped for Reap and Sew when a healing boost is needed, or for Slow the Advance if a hinder is needed.  Lightning Manifestation can be swapped for Fire Manifestation in fights without adds.  Iron Maiden could also be swapped for Brawler/Closer so your forced crits do more damage. – edit Update: I now use Brawler pretty consistently.

Rotation can be a little tricky, especially if you want to hit Elemental Force every time and cast Lightning Manifestation whenever you can.  [Edit: These days, I do builder x 6, TRB, Blaze, or builder x 6, Lightning mani, TRB, Blaze] Ideally: when Lightning Manifestation is up, Builder x 3, Lightning Manifestation, Builder x 3, [Short Fuse or Do or Die if up], Three Round Burst, Blaze; then Builder x 3, [Do or Die if up and SF is down], Blaze, Builder x 3 Blaze. You could also do Builderx6, TRB, Blaze, if that’s easier, when Lightning Manifestation isn’t up; I seem to get very similar numbers when I parse.  I’ve never gotten Pistol/Shotgun level numbers but it’s more about your ability to offer Short Fuse, and purges, off-heals and hinders if necessary, than the big deeps. Gear is typical recommended DPS gear, all attack, 800+ Pen, 650+ Hit, the rest Crit/Crit Power.

On TSW Deck Builder

VDM String:

The Magpies on The Secret World: Full Roster

Mains

On TSW Chronicle: Alzbeta Thom Kaloni Taiver Lightroad Tandr

Alts

On Chronicle: Sloane Ranin Persis Hippolyta Helcat Kheiron Baraquiel Vael LeChatNoir Sunderland Enchiridion Wadulisi Lykaina Alemi Waldeinsamkeit

Not Pictured/Friends of Magpies
Eschariot – MissGemma – Nethifa – Ixiya –  Cherith – EssVee – RageMage – Elithir – Noelleblue – Drudawg – spukhaft – NaomiBlue – SilveredSmith – Dualist – Helgheist

Our Cabals
The Mezzbrakers (Dragon) – Perchance (Templars) – Bee Holes (Illuminati)